How to Set Up Podcast Recording Software
You hit record. The episode sounds great. You play it back and something is off. Muffled. Echoey. A weird hum in the background.
This is one of the most common problems new podcasters run into. And the good news? It almost always comes down to setup, not your equipment.
This guide walks you through how to set up the podcast recording tools I recommend: Riverside, GarageBand, and Audacity. Whether you are just starting out or you have had a few frustrating sessions already, this will help you get it right before your next recording.
Table of contents
What Podcast Recording Software to Use?
Not all podcast episodes are the same, and the right tool depends on how you are recording.
For solo episodes, use an offline recording program. These do not rely on your internet connection, so there is nothing that can drop out or glitch mid-recording. It removes a whole layer of things that can go wrong.
- On a Mac: GarageBand. It is free and already on your computer.
- On Windows: Audacity. Also free, works great.
For online interviews with guests, use Riverside. It records each person locally on their own device, so you should get the cleanest audio and video possible.
If you decide to upgrade to a paid Riverside plan, use promo code AOLI for 20% off.
↓↓↓
Now that you've chosen and installed a recording program, let me show you how to set up each one so you get the best audio possible. Choose your recording software below:
How to Set Up Riverside
Riverside is the go-to tool for remote podcast interviews. It records each person locally on their own device, so you get clean audio even if someone has a shaky internet connection.
-
Open Riverside in Google Chrome. (Chrome gives the best results.)
-
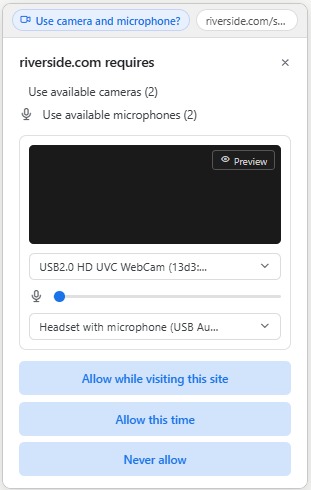
When the browser asks for microphone and camera access, click Allow. (If you accidentally clicked Block, go to Chrome settings and reset permissions for Riverside.)
-
In the green room (also known as the lobby), before the session starts, click the audio input dropdown and make sure it shows your external mic, not "Built-in Microphone."
-
Use the audio check Riverside provides. Say a few sentences and listen back before your guest joins.
-
Once you are in the studio, keep the Riverside tab open and active. Switching tabs mid-recording can cause issues.
How to Set Up GarageBand
GarageBand comes free on every Mac and works great for solo episodes or in-person recordings. It has more features than you need for basic podcasting but once it is set up, it is easy to use every time.
- Open GarageBand and select New Project.
- When the track type window opens, choose Audio and then Microphone.
- Go to GarageBand > Preferences > Audio/MIDI and check that your Input Device is set to your external mic, not Built-in Microphone.
- On your track, turn on the input monitoring button (the headphone icon). This lets you hear yourself while you record.
- Hit record and do a quick 30-second test. During this test, try to speak into the microphone from different angles and distances. Only then can you hear how your microphone behaves. Play it back and check before your real session.
In order to export your file once the recording is over, go to Share > Export Song to Disk. Choose the WAV format instead of MP3. WAV keeps the quality high for editing.
How to Set Up Audacity
Audacity is free, works on any computer, and is one of the most widely used podcast recording tools out there. It is not the most intuitive software but it is reliable.
-
Download Audacity from audacityteam.org. It is completely free.
-
Open Audacity and look at the toolbar at the top. Find the microphone input dropdown and set it to your external mic.
-
Next to it, set Recording Channels to Mono (1 channel). This is the right setting for most podcast recordings.
-
Hit record and speak for about 15 seconds. You should see a waveform on screen. If nothing shows up, your mic is not selected correctly.
-
Stop and play it back. Your voice should sound clear, and the waveform should stay comfortably in the center without hitting the top or bottom edges. If it reaches the edges, it's clipping, which indicates that your levels are too high. More on setting the levels in this Audacity article.
Settings to Sound Like a Pro (All Platforms)
These are the recording settings that work well for most podcast setups. But keep in mind that every mic and room is different, so always do a test recording first and adjust from there.
- Channel: Mono
- Format: WAV
- Bit depth: 24-bit
- Sample rate: 48 kHz
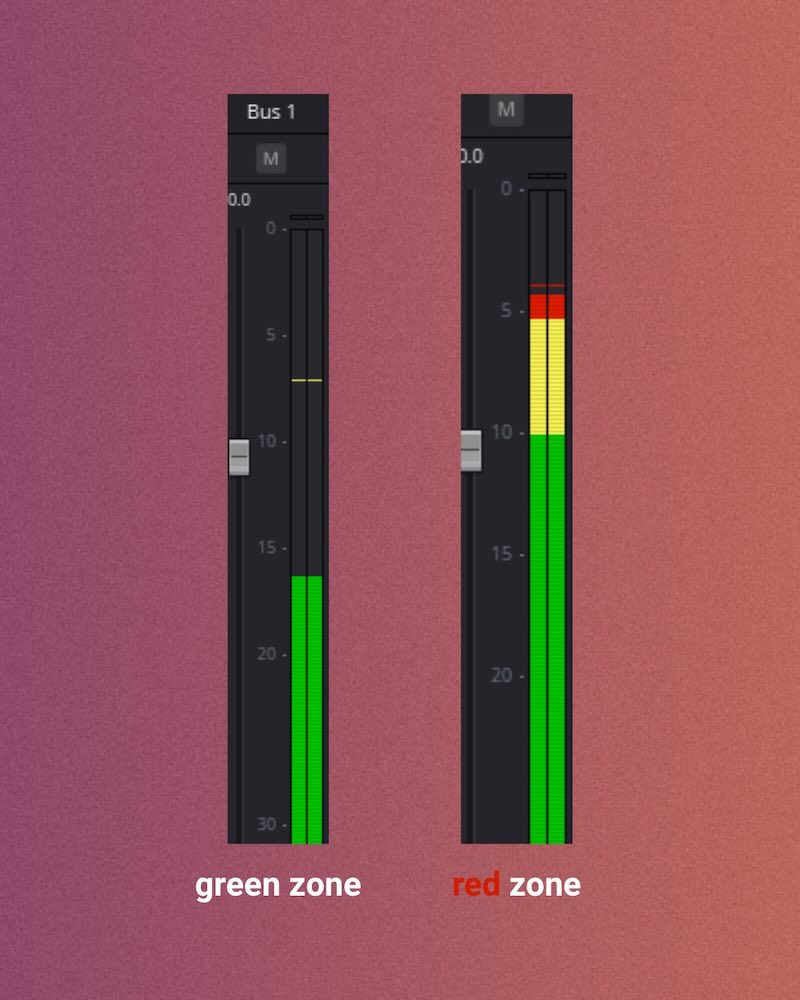
- Recording levels: Aim for around -20dB. To find your sweet spot, do a proper mic test before every session. Speak at different volumes, laugh, move around a little. Your levels should never hit the red zone, no matter what you do.
These are a solid starting point but not a strict rule. If something still sounds off after following these, your room or mic might need a small tweak.
Test, listen, adjust.
How to Fix Bad Sound
You followed every step and it still does not sound right. Here is what to check:
Muffled or muddy audio: Your mic is probably too close, covered, or pointing the wrong way. Most podcast mics pick up from the front, not the side or bottom. Do the audio test with headphones on.
Echoey or room-y sound: You are in a large bare space. Record somewhere smaller with soft surfaces. A closet or a carpeted room works really well. Even recording under a duvet helps. Also, your mic might be way too far from your mouth.
Humming or buzzing: This is usually electrical interference. Move away from your monitor, try a different USB port, or check your mic cable. It might also be your phone - switch on the plane mode.
Distorted or clipping audio: Your input level is too high. When recording, it should never go into a red zone. Lower the gain on your mic or dial it back inside your recording software.
Always Do This Before You Press Record
These steps apply no matter what podcast recording software you use. Do not skip them.
✅ Wear headphones. Always. If your speakers are on, your mic picks them up and creates an echo.
✅ Close everything else on your computer. Notifications, browser tabs, Spotify, Slack. Background apps create noise and slow down your CPU.
✅ Do a 30-second test recording first. Play it back before your real session starts. This one habit saves so much pain.
Ready to hand this off entirely?
At AOLI.fm, I handle everything from setup to production so you can just show up and record.