Podcast Essentials: 5 Things You Need to Start a Podcast
Although you can start a podcast with nothing but a phone and a recording app, the right equipment can make all the difference. High-quality gear ensures professional sound and a better listening experience.
Whether you’re just starting or looking to upgrade, this guide will walk you through the podcast essentials that are recommended for a minimal and affordable setup.
Recommended podcast setup
1. Microphone: Audio-Techica ATR2100-USB. Price: $109.99
2. Recording software: Audacity. Price: Free
3. Pop filter by Aokeo. Price: $9.99
4. Microphone isolation shield by Moukey. Price: $39.99
Total cost for all of your podcast essentials: $159.97
This is the setup we recommend to achieve great sound quality without breaking the bank. But you can start a podcast for much cheaper.
Let’s dive into additional options for every budget.
The Five Podcast Essentials Everyone Needs
1. Microphone
This is a debate. Do you need a microphone when starting a podcast? Or can you just record with a phone and a pair of earphones? Here are several microphone options with their pros and cons:
No microphone: You can record directly into your computer or phone’s microphone. But the sound won’t be good. And the microphone will likely pick up background noises that will be hard to edit.
Apple AirPods (Bluetooth): Don't use them. The microphone on your AirPods isn’t good. You're better off speaking into your phone's built-in mic.
Apple EarPods (wired): The microphone on the Apple wired earphones sounds surprisingly good. If you have them and want to keep your podcasting costs small, they're a good option. When recording with them, keep the microphone close to your mouth and do not let it touch your hair or clothes.
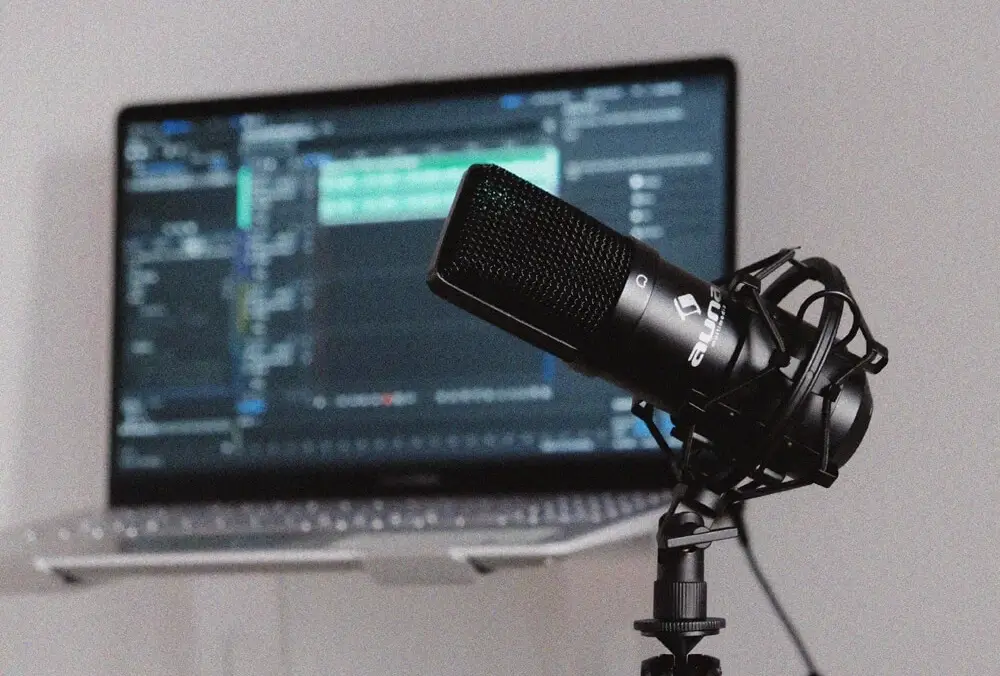
USB microphone: USB microphones are perfect for beginners. They’re easy to use. You plug them into your computer and you’re ready to record. We like the Shure MV7 (~$270).
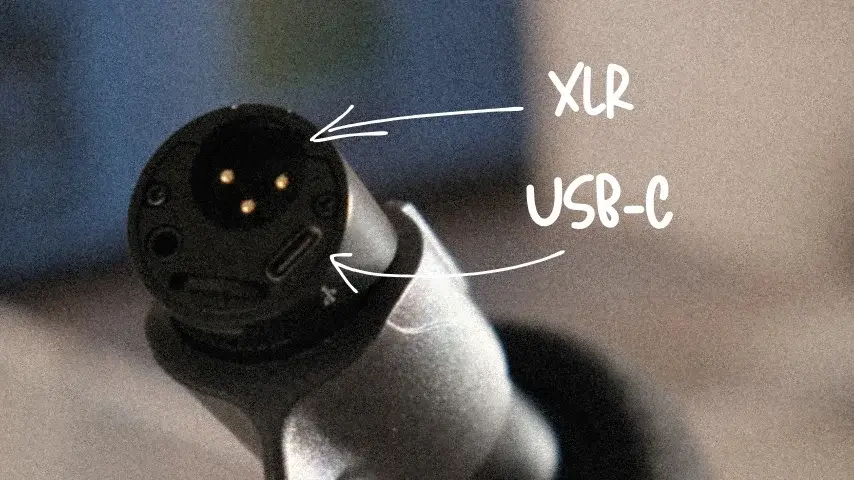
XLR microphone (best for in-person interviews): Most videocasts and podcasters use XLR microphones for interviews. They offer great sound quality. But to use them, you've got to use one more piece of equipment: an audio interface. This setup is ideal if your podcast episodes feature more than one speaker because the audio interface will record each speaker on an individual track. Plus, you don't even need a computer to record with it. Check out the Audio-Technica AT2040 ($100) or the Rode Procaster ($220).
For more microphone options, check out our review of the best podcasting microphones for 2025.
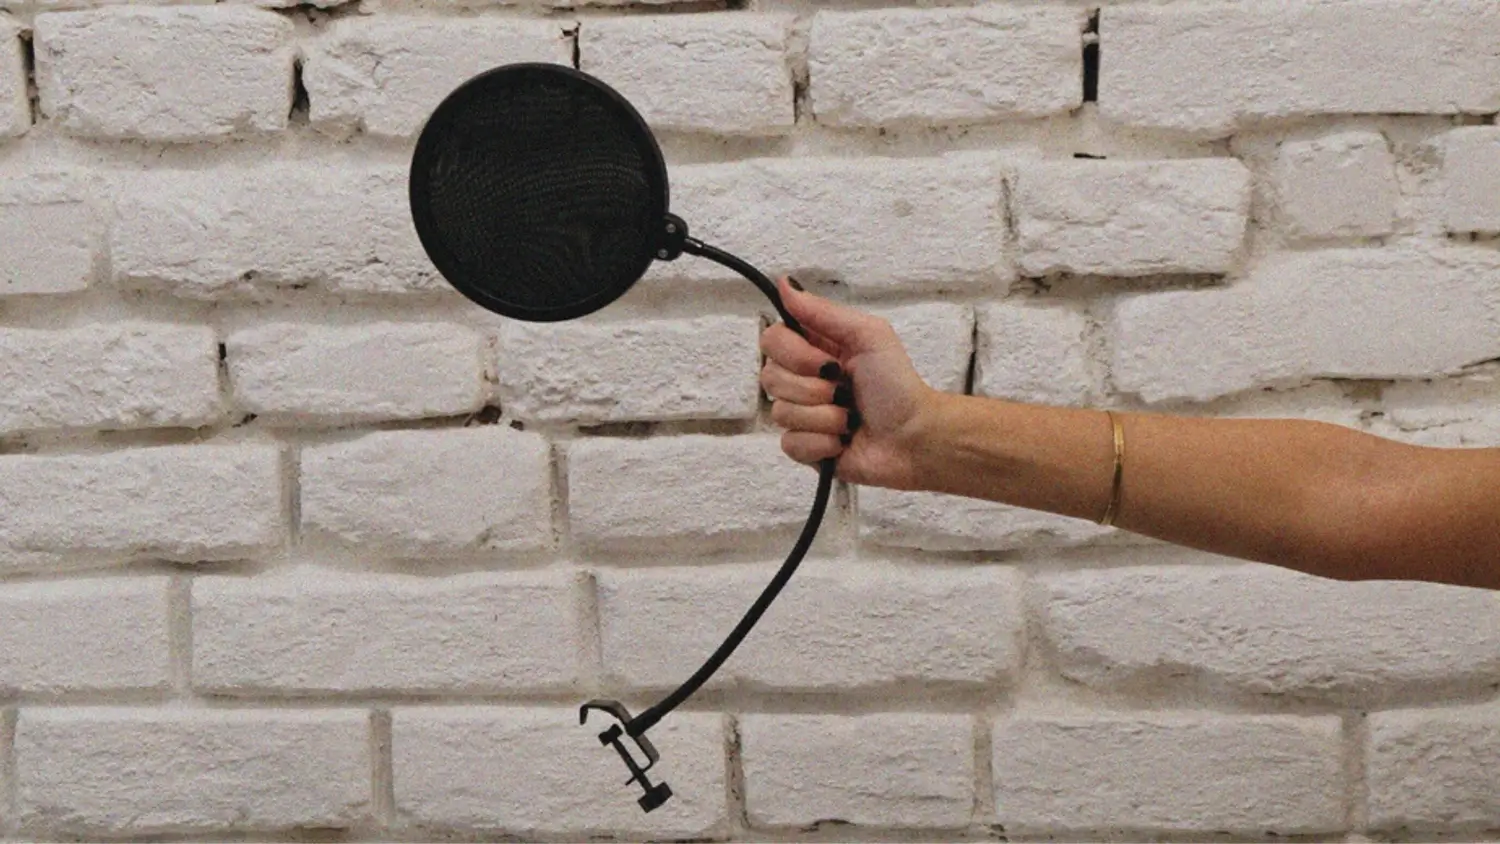
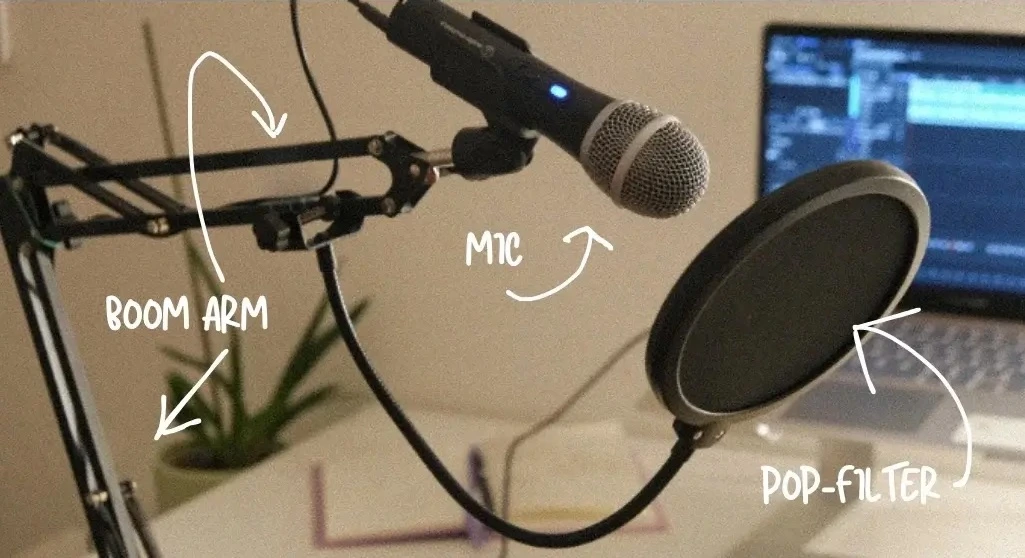
2. Pop filter
A pop filter is a piece of podcasting gear that filters out popping noises we make when pronouncing P's and B's. These sounds make for a poor listening experience and can irritate listeners.
A pop filter also smooths out your audio. It creates a warm sound that your listeners will appreciate, especially those wearing headphones. It also protects your microphone from saliva buildup, which can damage your gear over time.
Pop filters are super affordable. Check out the Neewer Pop Filter or the Aokeo Dual-Layer Pop Filter, both under $10.
Tip: position your pop filter 2-3 inches/5-8 cm away from your mic for the best results.
If you're recording outdoors, you'll want a windscreen instead. They look like foam socks you put your microphone into. They protect it from the wind and prevent it from spoiling your recording.
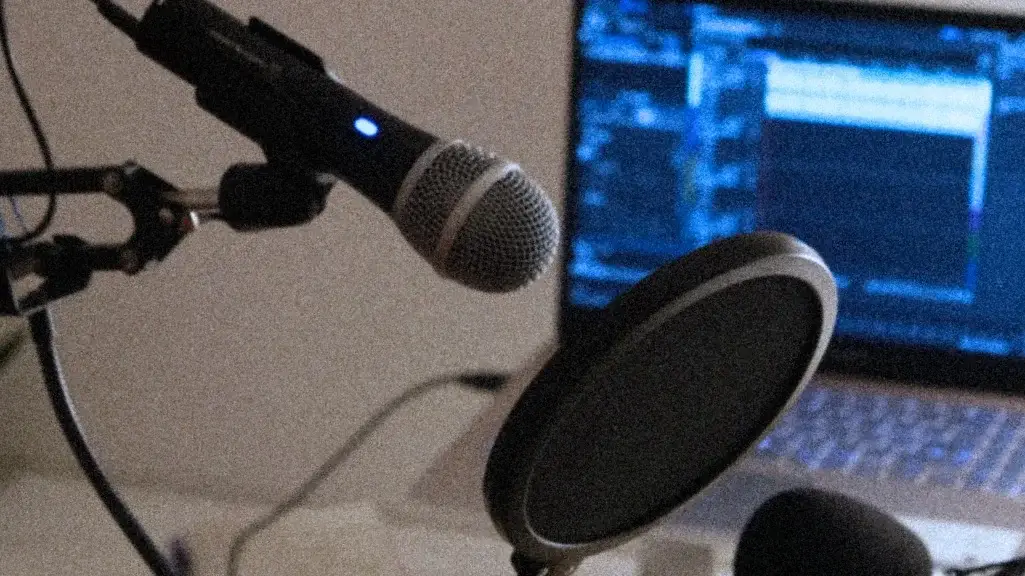
3. Boom arm
A boom arm is an articulated arm that holds your microphone. You mount it on the edge of a desk or table.
Microphones fixed on a tripod usually pick up the vibrations you create when moving your hands on the surface they’re set on. Right now, you’re probably thinking that you will keep your hands still during recordings. But you won’t. Most of us don’t when speaking.
A boom arm reduces vibrations and noises from your desk. You get cleaner audio with it. It also keeps your setup organized and lets you position your mic perfectly.
We recommend the Rode PSA1. It is a reliable, sturdy option for serious podcasters. For a budget-friendly option, the InnoGear Adjustable Boom Arm is great.
How to position your boom arm: securely mount the boom arm to your desk and position the mic slightly below your mouth for clear, natural audio.
4. Recording software
You need recording software to capture your audio files. Here are the most essential software options out there for different use cases.
For solo podcasting or in-person interviews
Audacity: Audacity is the go-to for most beginners. It is easy to use and has everything you need for recording and editing your episodes. It's free and available for both Windows and MacOS.
GarageBand is another free option. It comes pre-installed on Macs and is not available on Windows computers.
As you become more experienced, you might want to explore more advanced software like Adobe Audition and Logic Pro X.
For remote interviews
For remote interviews, use a dedicated platform like Riverside, Remotely, or Zencastr. They make it easy to record conversations online. These tools also let you record videos and edit them into short snippets, which is great if you plan to promote your podcast on social media.
If you decide to give Riverside a try, you get 20% OFF when you use our link.
For those who record on their phones
If you're choosing the budget route and use your phone for podcasting, you'll need an app to record. You can use your phone's native voice app, eg. Voice Memo on iOS, or download a third-party app.
Ferrite is a great iOS app with solid editing tools, perfect for podcasters.
Dolby On is our second pick. This one's available for both iOS and Android. It features noise reduction and audio processing.
What about online recording tools?
If you need a quick and simple way to record, online apps like Online Voice Recorder can help. However, they should only be a backup option. These tools don’t save your recordings, so you must download the file immediately, otherwise, it’s lost. Audio quality may also be lower compared to dedicated software.
5. Editing software
Your podcast recordings won’t be perfect out of the box. You’ll use filler words. You’ll lose your train of thought. Your kid will burst into the room while you’re recording.
That’s when editing comes in. Using the software, you can clean up your audio and remove unwanted segments before publishing it. You can also master your sound, add jingles and other sound bites, and even move bits of the conversation around to improve the listening flow.
Choosing the right software makes editing faster and easier.
If you’re already using Audacity or GarageBand to record your podcast, then you don’t need additional software. These free tools have basic editing features that will be enough for most non-technical podcasters.
For more control and advanced features, consider getting Adobe Audition, Hindenburg, or DaVinci Resolve.
These programs offer more sophisticated editing tools, effects, and multitrack recording and editing capabilities.
Other Podcast Equipment (Not essential but nice to have)
Acoustic treatment
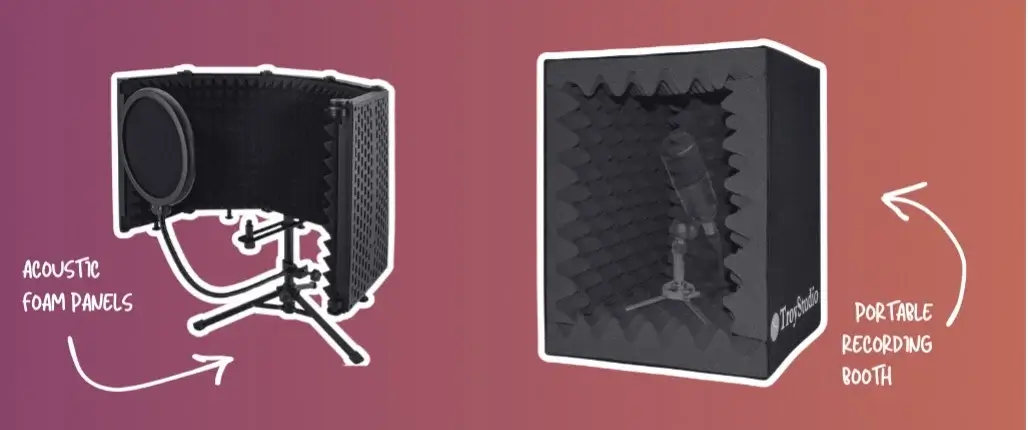
The environment you record in has a massive impact on the quality of your audio. If you want to sound clear and professional, consider investing $30-$40 in acoustic treatment.
Acoustic treatment filters out echo and background noise in your recording space.
We are not talking about turning your office or bedroom into a full-blown home studio. A simple desk foam shield will do wonders. They're inexpensive and portable.
We recommend the Portable Vocal Booth from TroyStudio and this foldable isolation shield. Both are under $40. They are easy to use and perfect for small spaces.
DIY option: If you don't want to invest in acoustic treatment, you can reduce background noise by setting up in a small room over a large open space. Closets are a favorite amongst budget-conscious podcasters. It's small and the clothes in it dampen the sound.
Learn more about how to create a perfect podcasting environment.
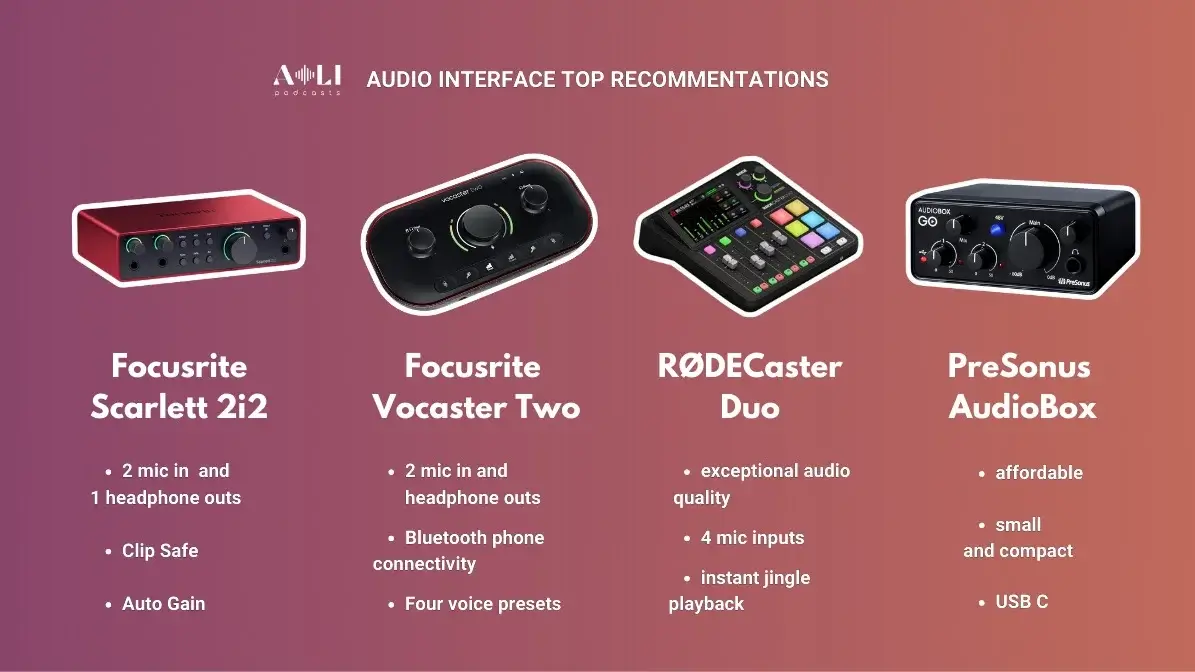
Audio Interface (for XLR microphones)
If you record with an XLR microphone, you’ll need an audio interface. This device allows you to connect your mic to your computer. It converts analogue sound to digital.
Audio interfaces let you record multiple tracks if you have co-hosts or guests. Each person’s voice is recorded on its own track, making editing much easier and your podcast more polished.
Another perk of using an audio interface is that you don’t even need a computer to record. Many interfaces are compatible with portable recorders, making them a great choice for podcasters on the go or those who record interviews remotely.
The Focusrite Scarlett 2i2 and more affordable Focusrite Vocaster Two or PreSonus AudioBox are fantastic options for anyone looking to get started with XLR setups. They are user-friendly and deliver excellent sound quality.
For more advanced podcasters, the RØDECaster Duo is a great choice too, but it's more expensive.
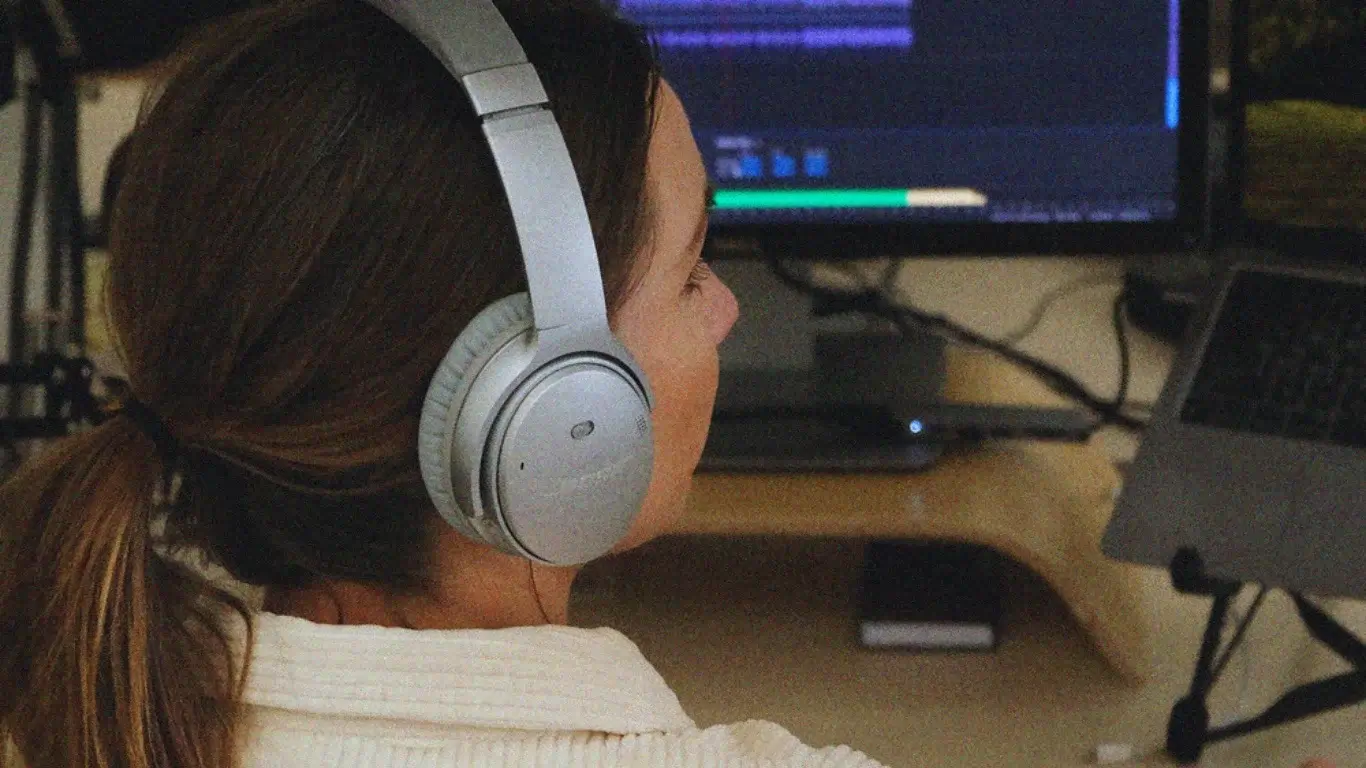
Headphones
Headphones are helpful when recording. Without them, you’re likely to run into issues that can ruin your audio quality.
Here’s how you can use headphones for podcasting:
Monitor your audio in real-time: good headphones let you hear exactly what your microphone picks up while recording. This helps you catch background noise or technical issues right away.
Prevent audio feedback: Ever been on a Zoom call where someone wasn’t wearing headphones and their mic picked up the echo of everyone’s voices? The same problem can happen during podcast recordings. Headphones prevent your mic from picking up playback audio. They eliminate echoes and overlapping sounds. This is especially important during remote interviews or online recordings.
Ensure a professional sound: by monitoring what you’re recording, you can adjust the sound as you go, especially if you're using an audio interface.
Closed-back headphones, like the Audio-Technica ATH-M50X or Beyerdynamic DT 770 Pro, are ideal because they prevent sound leakage. Open-back headphones can sound amazing, but they let noise leak out, which might mess with your recordings.
Portable recorder
Portable recorders are great for recording interviews or episodes on the go. They’re reliable and eliminate the need for a computer.
Our recommendations: Zoom H4 that records up to four tracks at the same time, or Tascam DR-40X with the four tracks as well.
Additional Resources to Launch Your Podcast
The right equipment makes a big difference in your podcast’s sound and overall experience. It helps you record with ease and sound more professional. Start with the basics, and as you grow, you can upgrade your setup. Investing in quality gear is always a smart move. It makes recording easier and your podcast better.
Now that you know what podcasting equipment to use, do you need help launching your podcast? Let us help! Book a free strategy session, and let's talk about your podcast.
Check out our additional resources for more tips and guides on podcasting: