Podcast Recording Tips: 7 Ways to Sound More Professional
Essential podcast recording tips aren't just about buying expensive gear.
In this guide, you'll learn exactly how you can create professional-sounding episodes, from setting up your recording space to choosing the right equipment, all without breaking the bank.
Let's get started.
1. RECORDING ENVIRONMENT
Creating the perfect recording environment doesn’t have to be complicated. Start by finding a quiet small room with minimal noise and echo. Spaces with furniture, carpets, curtains, or cushions work best because they help absorb sound. Avoid rooms with hard floors, like tiles or hardwood, since they create unwanted echoes.
If you don’t have a dedicated space, try recording in your wardrobe. Just set up your microphone inside, and if needed, use a small stool or box for your equipment. Leave the clothes inside – they will absorb more sound naturally.
For those looking to take it a step further, consider adding acoustic panels or foam to your recording area or a portable recording booth—that is an excellent option. These compact setups are designed to block noise and enhance audio quality. Affordable models like this or this are easy to use and perfect for small spaces.
Lastly, think of the temperature in the room you are recording - if your space is too hot or humid, it can be not only distracting but it might even affect your recording equipment.
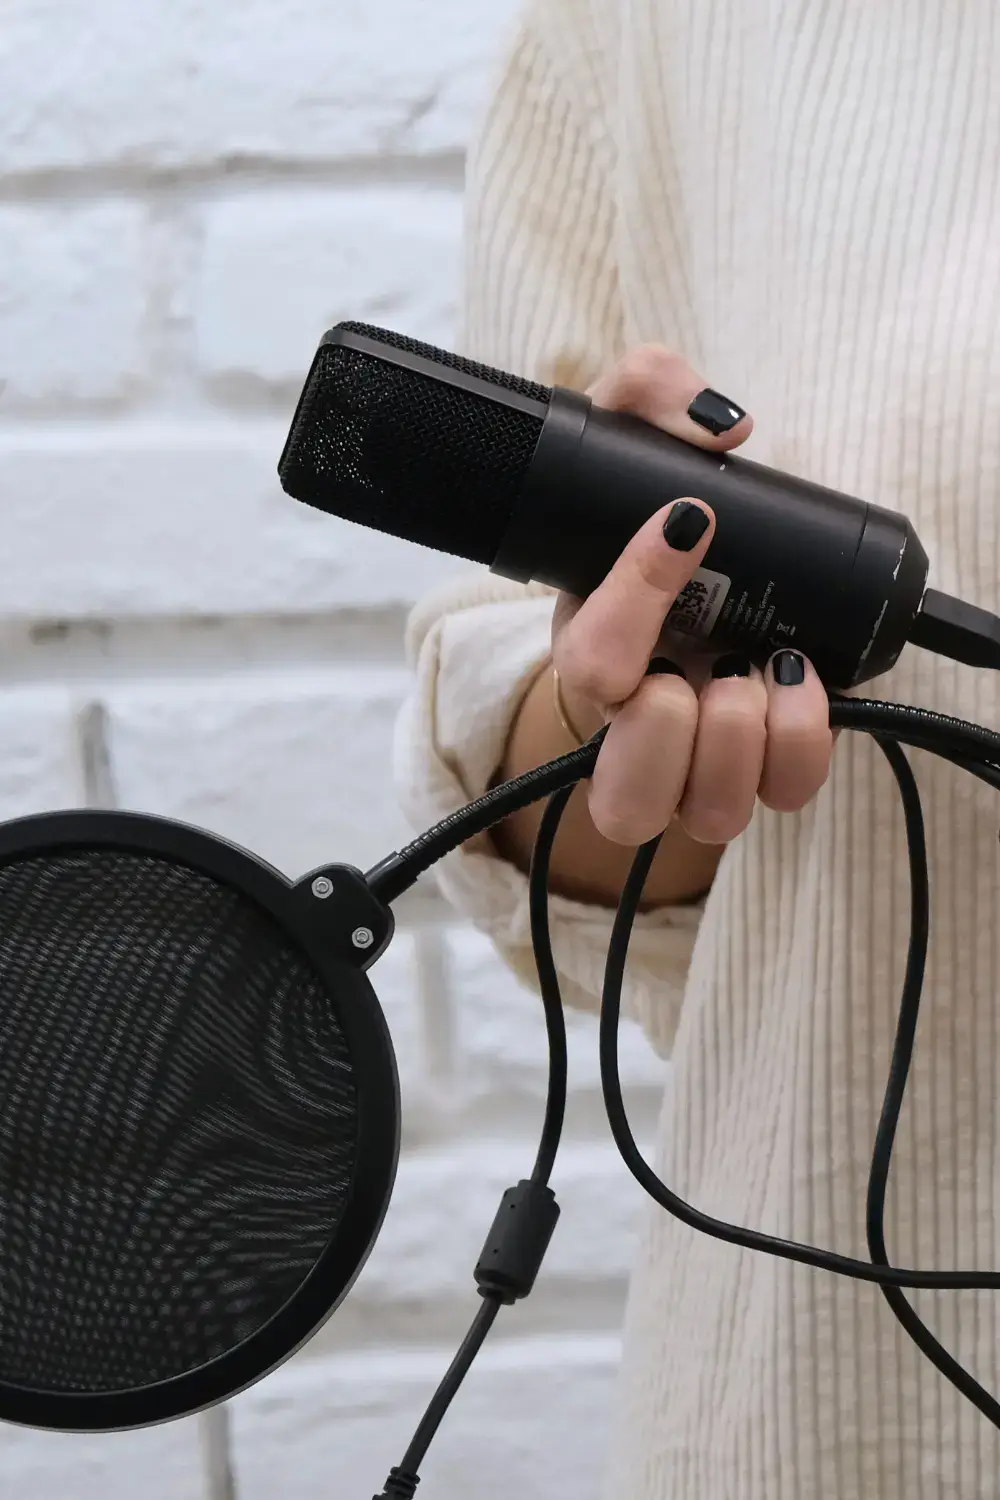
2. MICROPHONE SELECTION
If you want a great listening experience for your audience, get a microphone! Sure, you can also record the audio from the computer or phone directly. But then even the post-production editing might not be able to help with fixing all the background noises etc. Better than no microphone, you can use simple Apple EarPods with built-in microphones. The output sound from them is great; for podcast beginners, it’s enough, trust me!
Basically, there are two types of microphones: USB and XLR mics.
USB vs. XLR microphones: USB microphones are plug-and-play, making them easy to use for beginners. XLR microphones require an audio interface but offer superior sound quality and greater flexibility for advanced setups. An XLR setup allows for more professional audio control and can be upgraded over time.
Basic options: Simple choices like Apple EarPods with built-in microphones can suffice for beginners. Just remember to keep them close to your mouth and be careful not to let them touch your hair or clothes.
Advanced options: For better sound quality, invest in a high-quality microphone. USB microphones like the Audio-Technica AT2020USB+ are excellent starting options, providing good sound quality without needing additional equipment. These microphones are easy to set up and use, making them ideal for beginners.
See our mics recommendations in our article about The Best Podcasting Microphones.
Microphone accessories: Consider using a pop filter to reduce plosive sounds (the bursts of air that occur when pronouncing 'p' and 'b' sounds). A shock mount can help isolate the microphone from vibrations and handling noise, ensuring cleaner audio.
Grab our FREE Podcast Planning Worksheet for a more structured approach!
3. HEADPHONES
Headphones aren’t just a nice-to-have—they’re essential for good recordings. Think about how annoying it is when someone doesn’t use headphones on a Zoom call, and you hear your voice echoing back. That same problem can ruin your audio. Here’s why you need them:
Hear what you’re recording
Headphones let you listen to what your microphone picks up. Closed-back headphones are best because they stop sound from leaking into the mic. Open-back ones sound great but can let sound escape, which might mess up your recording.
Avoid audio problems in remote recording
If you’re recording with someone else online, headphones are a must. Without them, your mic might pick up the other person’s voice, causing echoes and overlapping audio. Make sure everyone in the session uses headphones.
4. PROPER POSITIONING OF YOUR MICROPHONE
When talking about the proper positioning of your microphone, we mean two things:
- Distance from mouth: Maintain a consistent distance of 15-20 cm (about 6-8 inches) from the microphone to ensure consistent sound quality. Too close, and you risk picking up unwanted noises like breathing and plosives; too far, and your voice may sound distant and echoey.
- Angle and direction: Position the microphone at a slight angle to minimize plosive sounds caused by air coming from your mouth. This can be achieved by speaking slightly past the microphone rather than directly into it. Experiment with different angles to find the best position for your voice.
Microphone stand: Use a stable microphone stand or boom arm to hold the microphone in place. This helps maintain a consistent position and reduces handling noise. A boom arm also allows for more flexibility in positioning and can free up desk space.
5. RECORDING SOFTWARE
Basic recording: For beginners, user-friendly software like Audacity or GarageBand (for Mac users) is recommended. These programs offer intuitive interfaces and essential editing tools. They allow you to record, edit, and export your audio files easily.
Advanced software: As you become more experienced, you might want to explore more advanced software like Adobe Audition, or Logic Pro X. These programs offer more sophisticated editing tools, effects, and multitrack recording capabilities.
Remote recording: For remote interviews or discussions, check out platforms like Riverside, Remotely, or Zencastr. They offer high-quality audio and video recording, making it easy to capture clear and synchronized conversations no matter where everyone is located.
By the way, if you decide to give Riverside a try, you can get 20% OFF with our referral link.
Recording tips: Before starting, test your recording setup to ensure everything is working correctly. Check your microphone levels and adjust as necessary to avoid distortion or low volume issues. Make sure all participants are aware of the recording environment requirements.
6. BACKUP RECORDING
Always have a backup! Imagine losing your recording because of a glitch. Nightmare, right? Use a secondary device to record a backup. This can save you from losing valuable content due to technical issues with your primary recording setup. You can use a separate audio recorder, another computer, or even a smartphone.
Your future self will thank you!
Regular saves: Save your recordings regularly during the session. If your software supports it, enable auto-save features to minimize the risk of data loss.
7. INTERNET CONNECTION
Stable connection: For remote recordings, a stable internet connection is crucial. Platforms like Zoom or Skype are used by a lot of podcasters, but we do not recommend it because these platforms rely heavily on internet connection and often cannot ensure maintaining a good recording quality.
Bandwidth management: Close unnecessary applications and background processes that might consume bandwidth.
Platform settings: Adjust the audio settings on your recording platform to prioritize sound quality. Many platforms offer options to enhance audio clarity, reduce background noise, and improve overall recording quality.
ADDITIONAL PODCASTING TIPS for your first podcast recording
Pre-recording checks: Test your equipment before starting. Conduct a short test recording and playback to check for any issues. Verify that all participants have the correct setup and understand how to use their equipment.
After recording: Save your recordings immediately. Back up your files to multiple locations like an external hard drive or cloud storage. Review the recording to ensure it meets your quality standards.
By following this technical checklist, you'll be well-prepared to create podcast recordings that are enjoyable for your audience to listen to.
With the right preparation and equipment, your podcast can sound professional and engaging from the very first episode!
Check out our additional resources for more tips and guides on podcasting: